I want to start this post with a confession.
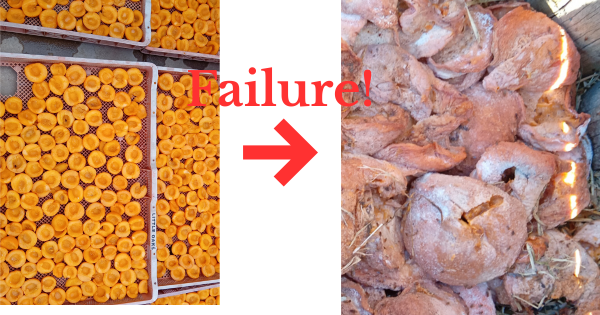
A week ago, I bought 80 kg of peaches at the end of summer. The price was right, the fruit was perfect, and I had grand plans for a pantry full of sun-dried gold. What I ended up with was a very expensive lesson in what not to do.
I documented the whole thing on YouTube — the mistakes, the mould, the rescue attempts, and eventually, what I changed. I’ll link that video below because I think it’s more useful than any perfectly polished tutorial. Real homemaking comes with real failures. What I want to share in this post is the other side of that story — what I understand now that I didn’t then, and the practical approach I will forever now implement to process a full crate without losing a single batch.
It starts with understanding three things your peaches need from you: the right temperature, the right airflow, and respect for your local humidity. Once those click into place, the rest is just preparation.
First, Let’s Talk About Why Peaches Go Wrong
Have you ever noticed how a cut peach left on your counter goes soft and sticky within hours? That’s not just the fruit ‘going off’ — it’s moisture. Peaches are about 88% water, and once you cut them, that water wants to go somewhere.
When we sun-dry, we’re simply giving that moisture a controlled exit route. The heat encourages it to the surface, and the air carries it away. When that system works, you get beautifully dried, shelf-stable fruit. When it doesn’t — when the moisture has nowhere to go, or worse, when it just sits there in warm stillness — you get the conditions mould dreams of.
That’s what happened to my 80 kg. I had the fruit. I had the motivation. What I didn’t have was airflow, the right humidity or the scorching mid-summer heat from the Karoo. And in January, where the air can feel almost perfectly still in the midday heat, that was enough to ruin batch after batch before I figured out what was going wrong.
The Three Things That Actually Make Sun-Drying Work
1. Temperature — More Is Not Always Better
You need consistent heat — ideally between 35°C and 45°C — sustained over several days. In the Karoo, this is genuinely achievable from about 8am to 6pm during peak summer.
The sweet spot is steady, building warmth. A scorching 48°C day might seem ideal, but extreme heat can harden the outside of the fruit while the inside stays wet — sealing moisture in rather than drawing it out. Think of it like searing meat too fast. The outside closes up before the inside has had a chance to cook through.
Good to know: Overcast days are not wasted days. If it’s still warm (above 33°C) and breezy, your fruit will continue drying. Bring trays inside only if rain is likely.
2. Humidity — Your Biggest Variable on the Highveld
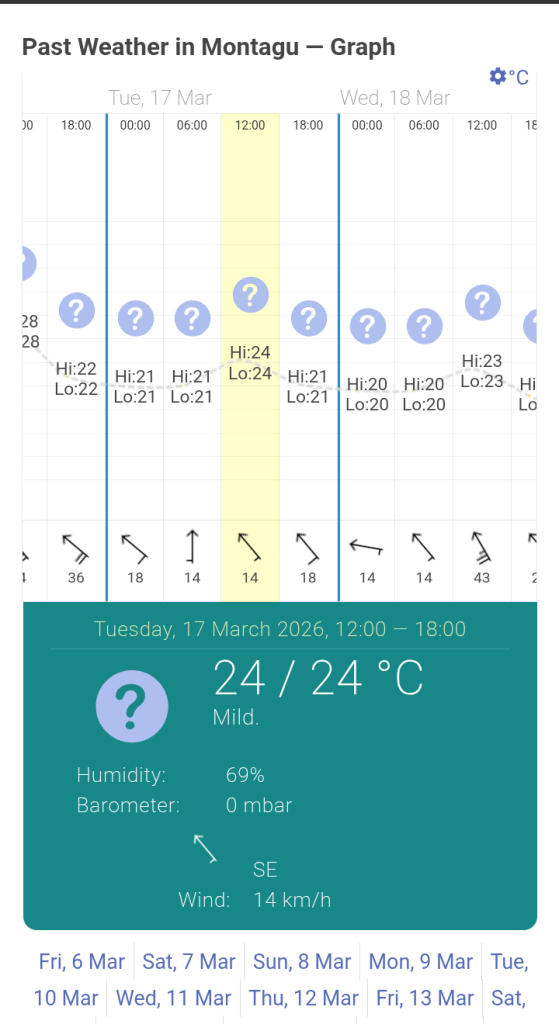
Here is the good news if you’re in the Gauteng interior, the Karoo, or anywhere on the highveld: you have a natural advantage. Our dry summer air — typically 20–40% relative humidity during the day — is almost perfect for sun-drying.
Humidity is essentially the air’s capacity to absorb more moisture. Dry air is hungry for it. Humid air is already full. When your fruit is releasing moisture and the surrounding air is dry, that moisture transfers quickly and efficiently. When the air is humid — think coastal Durban in February — that transfer slows dramatically, and your window of safe drying narrows.
On the highveld, watch out for two windows when humidity climbs: early mornings (before 9am, when overnight dew is still in the air) and late afternoons heading into potential thunderstorm season. Those are the times to bring your trays under cover or into a well-ventilated shed.
Practical rule: If the air feels heavy or you can smell rain coming, bring your trays in. It takes five minutes and saves a whole batch.
3. Airflow — The One I Learnt the Hard Way
This is the one that got me. Airflow is not a nice-to-have — it is the engine of the whole system.
Here is how to picture it: imagine your fruit is releasing a cloud of tiny moisture droplets into the air around it. If that air is still, that little cloud just sits there, hovering. The surface of your fruit stays damp. Bacteria and mould find exactly what they need. If that air is moving — even a gentle, consistent breeze — it sweeps that moisture cloud away and constantly replaces it with fresh, dry air, ready to pull more moisture from your fruit.
The highveld often has good afternoon breezes, which is a genuine gift. But it can also go dead-still in the midday heat. That’s when you position your trays to catch whatever movement there is, and why elevation off the ground matters — air circulates better when it can move underneath the tray as well as over it.
- Use elevated wire racks or traditional slatted wooden drying frames — never trays flat on a solid surface.
- Position trays facing the direction of the prevailing afternoon breeze.
- Leave space between every slice — touching fruit traps moisture between pieces.
- On very still days, a simple oscillating fan in a shaded, ventilated space can do what the outdoors cannot.
How to Actually Prep a Full Crate Without Losing Your Mind
Processing in bulk is a different rhythm from processing a small punnet. It requires a system, not just a recipe. Here is how I approach it now.
Set Up Like a Kitchen Assembly Line
Assign one station per task: washing, halving and stoning, slicing, tray loading. If your children are old enough, this is genuinely wonderful living-curriculum work — they learn fractions (cutting in half), food safety, patience, and the satisfaction of a full tray. My kids have their stations, and they take them seriously.
Slice Evenly — This Is More Important Than You Think
Aim for slices about 6–8 mm thick. I know that sounds precise for what feels like a relaxed summer activity, but here’s why it matters: thinner slices dry faster and can become brittle or over-dry at the edges before the centre is done. Thicker slices take much longer and risk the surface hardening while moisture is still trapped inside.
You don’t need a mandoline — a sharp knife and a bit of consistency is plenty. After your first tray, you’ll have a feel for it.
To Pre-Treat or Not?
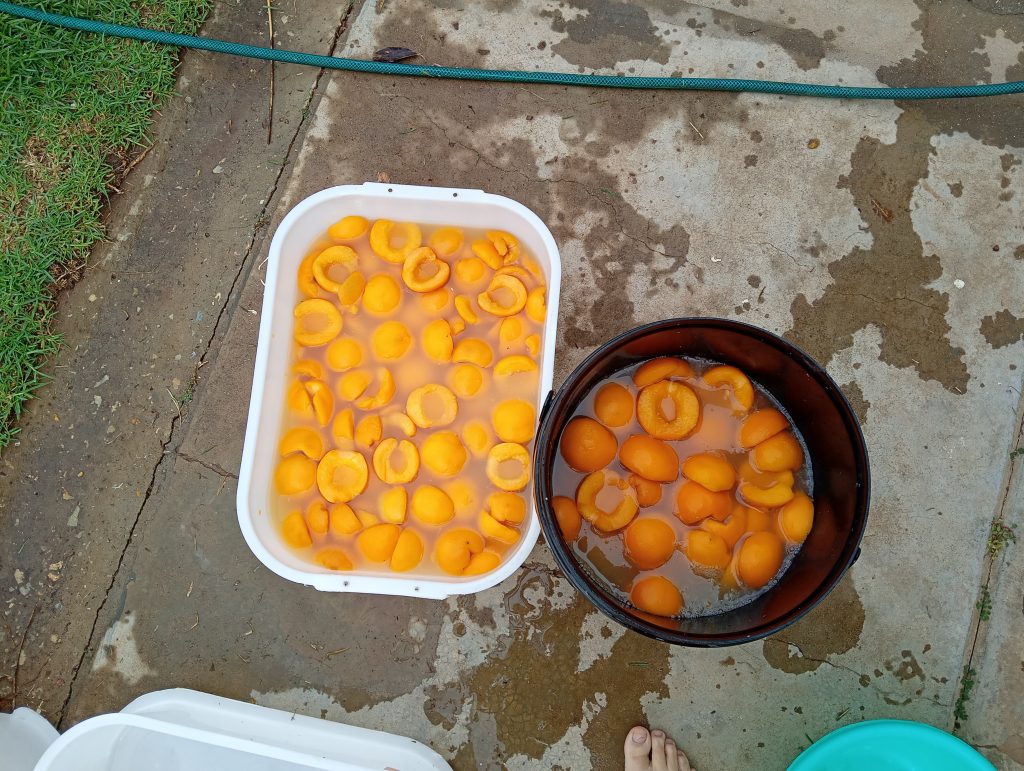
A quick dip in diluted lemon juice (roughly 1 part juice to 4 parts water) slows the browning that happens when cut fruit is exposed to air. It doesn’t affect the drying or the shelf life — it’s purely about colour. Some batches I do it, some I don’t. The amber-brown of an untreated dried peach has its own honest beauty, and I’ve come to love it.
How to Know When They’re Actually Done
This is the question I get asked most. And the honest answer is: it’s not a clock, it’s a feeling — but I can teach you that feeling.
Depending on your conditions — temperature, humidity, airflow, slice thickness — sun-drying takes anywhere from 3 to 5 days on the highveld in peak summer. Don’t try to rush it by leaving fruit out overnight (the dew will undo a day’s work). Bring trays inside before sunset, and take them back out once the morning dew has cleared, around 9am.
The Three-Part Check
- The Fold Test: Pick up a slice and fold it. It should bend without cracking, and unfold without sticking to itself. Sticky = still too wet. Cracking = over-dried (still usable, just brittle).
- The Centre Check: Cut your thickest slice through the middle. No visible moisture, no glistening. The texture should look and feel consistent all the way through.
- The Cool-Down Rule: Always test cooled fruit, not warm fruit. A piece that feels dry straight off the tray can still have moisture locked inside. Let a few pieces cool to room temperature first, then test.
One Last Step Most People Skip: Conditioning
Once your peaches pass the dryness check, don’t immediately seal them away and call it done. Condition them first.
Pack the dried fruit loosely into a clean jar — about two-thirds full. Seal it and leave it at room temperature for 7–10 days, giving it a good shake once a day. What you’re doing is redistributing any remaining moisture evenly across all the pieces, so no single slice is hiding a damp spot that will eventually spread to the rest.
If you see condensation on the inside of the jar at any point during those 7–10 days, tip the fruit back out and give it another day or two on the tray. It’s not a failure — it’s the system catching what the visual check missed.
Once conditioned, move them to your sealed pantry jars. Stored in a cool, dark cupboard, properly dried and conditioned peaches will comfortably last 9–12 months. Some of my best batches have gone 18 months without any noticeable loss of quality.
Your Free One-Page Harvest Guide
To go alongside this post, I’ve put together a one-page Scientific Guide to Sun-Dried Peaches — designed to live on your pantry door during harvest season, not sit forgotten in a downloads folder.
It covers everything in this post in a quick-reference format: the temperature and humidity windows, the airflow checklist, the dryness test sequence, and the conditioning steps. Print it, laminate it, stick it up.
It’s free. And when you download it, you’ll also be first on the waitlist for the April issue of The Homemaker’s Almanac — where we go even deeper into building seasonal preservation systems that genuinely work for South African homes.
→ Download the Free Sun-Drying Guide + Join the April Almanac Waitlist
A note last note from me(Marlé): If you’ve had a batch go wrong before, please know you’re in very good company. The 80 kg peach disaster is one of my most-honest videos for a reason — because failure is where the real learning lives. The goal isn’t perfection. It’s understanding. Once you understand why something works, you can fix it when it doesn’t.
→ Watch the video: Why My 80 kg Peach Harvest Failed
Warmth,
Marlé